Head Tracking FPV Setup on RC Plane or Car?
How to setup head-tracking FPV equipment onboard RC plane or car? That is the question many RC flyers and drivers have asked. The concept is quite simple to understand actually. No need to involve complicated soldering or programing on flight controller, etc. All you need are two extra channels on transmitter and receiver to accommodate pan and tilt servos for the camera gimbal and preferably one more channel to switch power on/off to air unit (VTX) to keep it from over-heating when vehicle is not moving to cool off the air unit.
The head-tracker uses trainer mode on typical RC flight transmitter to input signal to your transmitter (master) and HT is recognized as the student transmitter. Instead of outputting flight control signals, the HT only controls the pan and tilt servos. For surface vehicles, RadioLink Transmitters have DSC port ready to accept head tracker output. Just make sure the output channels on HT match the input channels on the transmitter, that’s it!
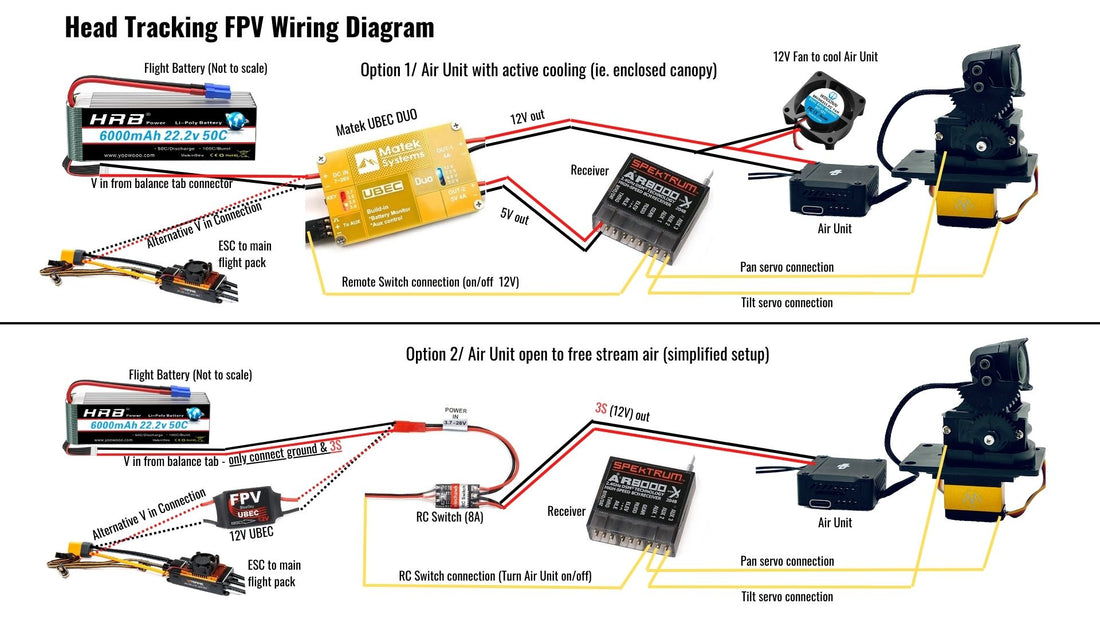
Please refer to following diagram for two options on setting up the Head tracking FPV equipment onboard. First one is for enclosed cockpit or surface vehicle where active cooling is needed for Air Unit. Second option is for simple setup with open cockpit (free stream air cooling). Links to different components below:
Matek DUO UBEC: https://www.readymaderc.com/products/details/matek-ubec-duo-esc-4a-12v-5v
12V 25mm Fan: https://www.amazon.com/WINSINN-Bearing-Brushless-Cooling-25mmx10mm/dp/B07KS69YYW
RC Switch: https://www.amazon.com/dp/B08FLVGTXQ/ref=twister_B08FLY7SY5
12V UBEC: https://www.amazon.com/QWinOut-Ultralight-Telemetry-Transmission-MultiCopter/dp/B08546MDWY/ref=sr_1_6
